MailChimp is a simple, but incredibly useful tool for all your email marketing needs. It allows you to create striking, effective email marketing campaigns through simple drag and drop functionality whilst also being equipped with the ability to generate detailed reports on the efficacy of your marketing efforts.
It’s very easy to use; but there’s no harm in making an easy thing a little easier. So, here’s a step-by-step guide on how to use MailChimp, for all your email marketing purposes.
Before You Get Started – What You Need to Know About MailChimp
The good news is that MailChimp will work in most browsers, which saves you from downloading any additional software. Just make sure you enable cookies, popups and JavaScript and you’re ready to go.
But, before you start creating your recipient list and customising your layout, it’s important to understand that MailChimp is absolutely anti-spam. This is a good thing, but it means you have to go through a few steps before you can start emailing people.
Firstly, you must have tangible proof that every subscriber on your list has asked you to contact them, and that they understand they will be receiving emails from you. Tangible proof does not include verbal permission or email addresses taken from business cards or social media. Third party lists are also unacceptable.
This is all set out, and explained in MailChimp’s Terms of Use.
MailChimp Pricing
MailChimp offers three different pricing levels. So, chances are, there’s something to suit both your needs and your budget. The pricing structure goes a little something like this:
- Entrepreneur: Send 12,000 emails to 2,000 subscribers for free every moneth. No contracts, and no credit card required. It’s free forever.
- Growing Business: Send an unlimited number of emails to up to 50,000 subscribers with a monthly account, or purchase email credits that never expire. This plan ranges from $10 to $25 per month, depending on the number of subscribers you have.
- High Volume Sender: This plan is for those of you out there with more than 50,000 subscribers. Prices start from around $400 per month.
Creating A MailChimp Recipient List
It’s always best to maintain one recipient list because (as we learnt above), MailChimp bills you on the basis of your total subscriber count. So, if you have one recipient on three different lists, you’ll have to pay for that recipient three times.
Even if you maintain one list, it is still possible to send out different emails to different sections of the list meaning you can engage in all sorts of email marketing, without adding any extra cost. MailChimp has an entire section of its website dedicated to mailing list segmentation and groups. Check it out if you need some further advice.
The first step in creating a recipient list is creating a space for all the names to go. To do this:
- Register or Login to your MailChimp account via the buttons in the top right-hand corner of MailChimp’s website homepage.
- Click on the ‘Lists’ tab in the MailChimp dashboard

- Click on ‘Create List’ in the upper righthand corner.
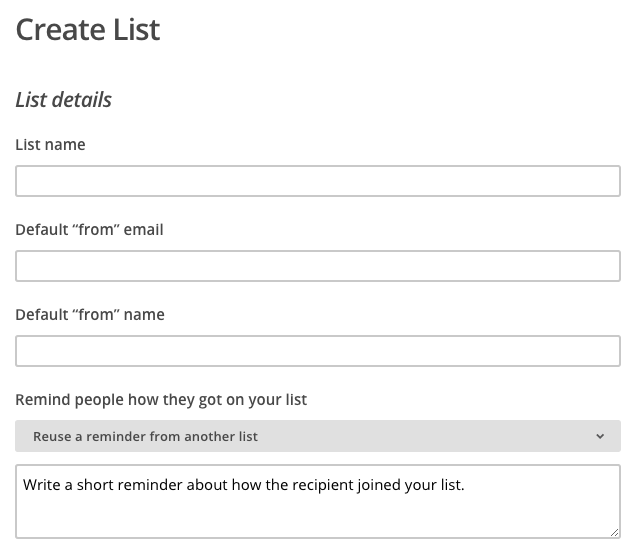
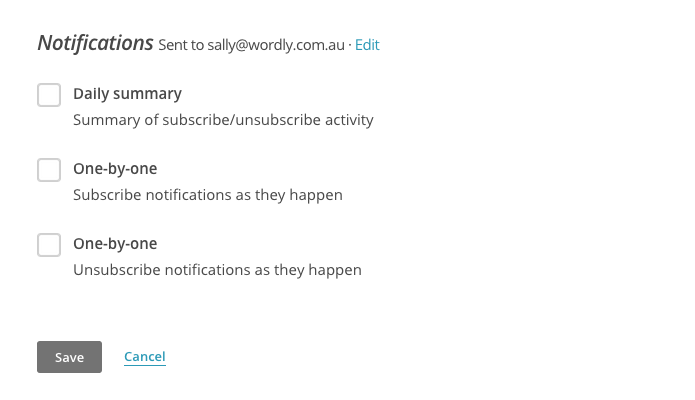
- Complete all the relevant information in the ‘List Details’ section, including name, default ‘from’ email and name, a reminder on how people were added to your list, and your notification preferences.
- Click ‘Save’.
Adding People to Your MailChimp Recipient List
MailChimp can even help you to add people to your subscriber list. MailChimp provides you with an automated sign-up form, which can be customised and then shared, posted on your website or added to your Facebook page. So people can become subscribers before you’ve even sent out your first email.
You’ve created the list, now its time to start filling it with names and emails:
- Navigate to the ‘Lists’ tab.
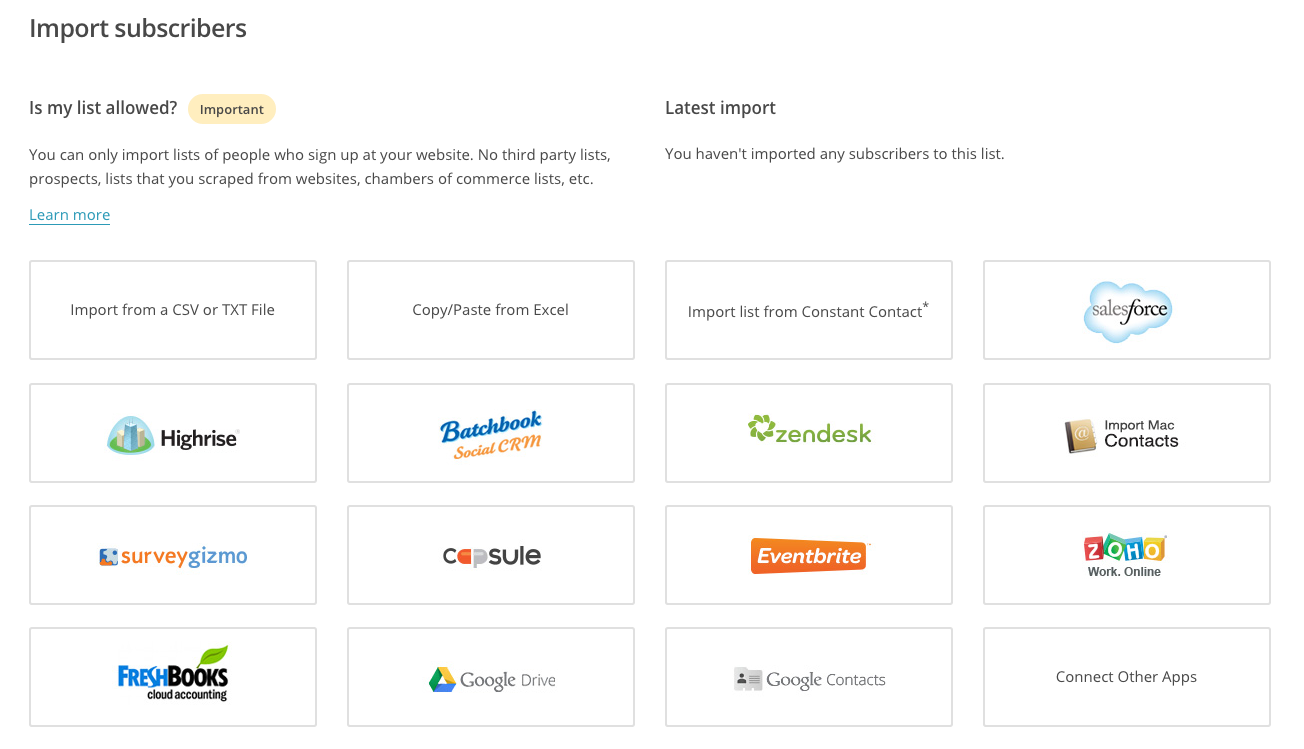
- Choose ‘Import’ from the drop down list next to the name of the list you want to import to.
- Select whichever import option you would like to use from the extensive list.
- Follow the prompts that appear on-screen.
In four easy steps, you have a list of willing recipients of your email marketing campaign.
Creating and Changing Your MailChimp Template and Campaign
In MailChimp, each email marketing campaign is designed around a pre-built template. You can choose between importing or coding a custom template or using one of MailChimps built in templates.
To create your own template, click on the Create Template button, where you can paste in a custom coded design, or upload templates from an HTML or ZIP file. You can also take a built in MailChimp template and customise it.
After you’ve saved your selected template, you can start creating your campaign.
MailChimp provides a variety of basic email layouts, which can be customised using drag and drop. You can also add, move, delete duplicate and style individual content blocks and the design layout can be saved for future campaigns.
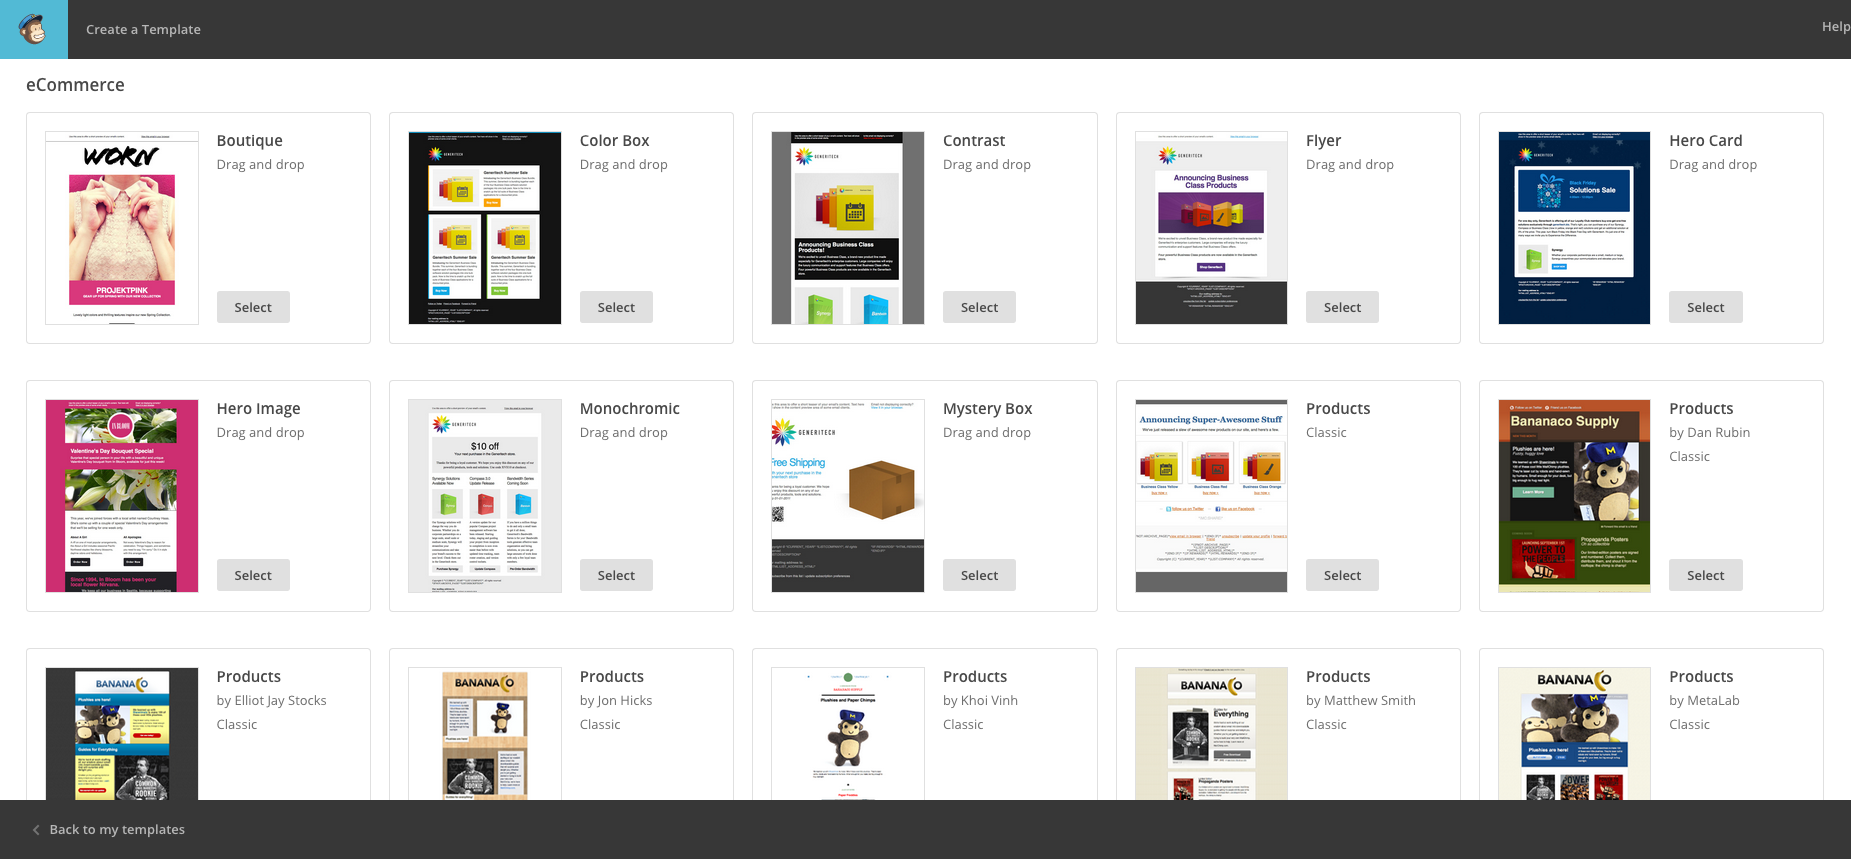
Now let’s run through the steps required to create a Campaign:
- Navigate to the ‘Campaigns’ tab in the top left-hand corner of the screen.
- Click on ‘Create Campaign’ in the top right-hand corner of the screen.
- Choose which type of Campaign you’d like to send. You have a number of options:
- Regular Campaign
- Plain Text Campaign
- A/B Split Campaign
- RSS-drive Campaign
- For the sake of this example, we’ve opted for ‘Regular Campaign’.
- Select which list, and which sub-set of which list you’d like to receive the campaign. Then click ‘Next’.
- Choose a name for the campaign (the recipients will not see this).
- Type in information including email subject, your name, your email address. Then click ‘Next’.
- Use drag and drop function to change templates.
- Choose a theme, which can also be modified using drag and drop.
- Add your content.
- Use Content, Style and Settings tabs in editor to further edit your campaign. You can also add and format text, upload images and create links within each content block.
- Use MobileStyles option to create a mobile friendly layout.
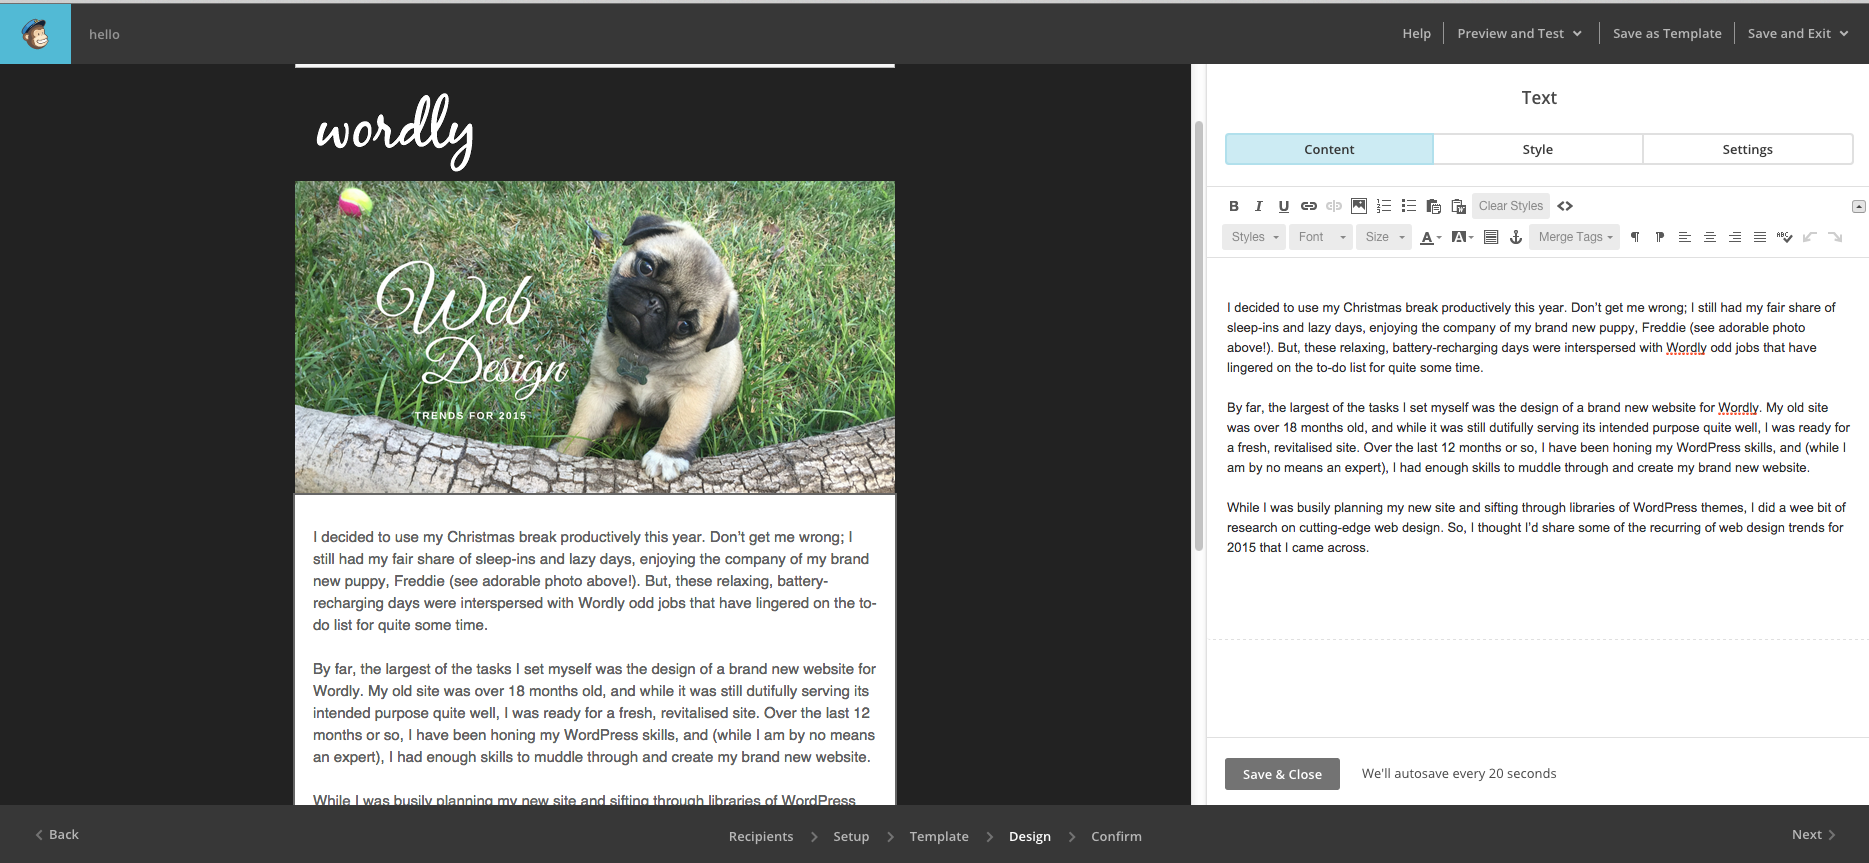
Once you’re happy with the design, you can preview and test the campaign:
- Choose preview mode in the menu to see how it will look on a desktop, as well as a mobile device.
- Send a test email. People involved in the campaign can check your work. You can use LinkChecker to ensure all links are valid. Use SocialCards to create an image and a snippet, which will appear if anyone shares your campaign on Facebook or Twitter.
- Check Inbox Inspector to see how your campaign will appear across a variety of Email hosts.
- Run spamfilter. There’s no point going to all this effort if you’re campaign doesn’t make it past any spam blockers.
- Go to the Confirm page. Go through all the checks again. MailChimp will alert you of any possible issues at this point
And finally, press send.
You can choose to send it immediately, or schedule a date and time for it to be sent.
Check your Reports to Improve Your Next MailChimp Campaign
MailChimp provides excellent resources for analysing the success of your email marketing.
To access your reports, go to the campaign and select one of the following options:
- Overview: gives you a glance at the number of opens, clicks, social engagement, unsubscribes and bounces.
- Activity: allows for a more detailed investigation into the reports. Which addresses bounced, who unsubscribed, who opened or didn’t open your campaign.
- Links: conveys information about how each tracked link performed. How popular the links you included were.
- Social: who liked your campaigns on Facebook. Who refers you the most.
- eCommerce360: if you have this in your account it will create a report of the total sales generated by the campaign. You can track a customer all the way from clicking on your campaign to the time they make a purchase.
If you’re thinking about doing some email marketing there’s no better piece of software than MailChimp. It looks after you from the beginning until the end and remains simple, but effective the whole way through.
For some more light reading on email marketing, take a look at Choosing Email Marketing Software
Sally Wood
Latest posts by Sally Wood (see all)
- 6 Free Marketing Plan Templates - July 22, 2018
- The Ultimate Guide to Instagram Advertising - June 23, 2018
- Q&A with Amy Cockerell, Marketing Coordinator at the TAC - October 6, 2016


